


Living room gallery wall layout ideas and tips
Written by: Daniel Koren, Co-Founder, Frameology
Key takeaways
Leave a 6–10 inch gap between the sofa back and the lowest frame, with 2–3 inches of consistent spacing between all frames.
Anchor the arrangement with the largest or most central piece first, then keep the overall center at 57–60 inches from the floor.
Target a gallery width that spans roughly two-thirds of the sofa, about 52 inches for a standard 78-inch sofa.
Use six proven layouts, including grid, asymmetric anchor, horizontal row, triptych, salon cluster, and linear stack, each with sofa-specific guidance.
Rely on Frameology’s ready-to-hang gallery walls with life-size templates that remove guesswork and speed up installation.
Get extra support from troubleshooting tips, FAQs, and step-by-step gallery wall template instructions so you can hang with confidence.
Ideal spacing and height above a sofa
Start with the gap between your sofa and the lowest frame, then layer in spacing, width, and eye level. Leave a 6–10 inch gap between the top of the sofa and the bottom of the lowest frame so the arrangement feels visually connected to the furniture. Space individual frames 2–3 inches apart, measured consistently from outer edge to outer edge. Place your anchor piece, the largest or most central frame, first, then build outward. Keep the center of the entire arrangement at 57–60 inches from the floor.
Living room formula
Use this quick reference as your checklist before you pick up a hammer:
Anchor piece first: place the largest or most central frame at the visual center of the arrangement, targeting 57–60 inches from the floor. This anchor sets your baseline height for every other frame.
Sofa-to-frame gap: leave 6–10 inches between the top of the sofa back and the bottom of the lowest frame, and increase to 10–12 inches for high-cushion sofas so people can lean back without bumping frames.
Frame-to-frame spacing: keep 2–3 inches between every frame, applied consistently across the entire layout so the wall reads as one composition.
Gallery width: aim for roughly two-thirds of the sofa’s total width, which is approximately 52 inches across for a 78-inch sofa.
Sofa gap takes priority: when the 6–10 inch sofa rule and the 57-inch eye-level rule conflict, prioritize the sofa relationship so the art feels grounded.
Now that you have the quick reference formula, you can look more closely at the most important measurements, starting with height above the sofa.
How high should a gallery wall hang above a couch?
The gap between the top of the sofa back and the bottom of the lowest frame matters more than any other measurement. The 6-to-8 inch rule is the most widely cited guideline, and most sources extend the acceptable range to 6–10 inches. Gaps under 4 inches feel cramped, and gaps over 12–18 inches start to disconnect the art from the furniture below.
The standard 57-inch eye-level rule still applies to the center of the overall arrangement, but it comes second. Matúš Koleják, Co-Founder of MeltFlex AI Interior Design, explains it clearly: "Hang art so the bottom of the frame sits 15 to 20 cm (6 to 8 inches) above the top of the sofa back. The artwork should span roughly two thirds of the sofa width, and its center should land near 145 cm (57 inches) from the floor, which is average eye level. When the two rules conflict, the sofa relationship wins."
For high-cushion sofas, increase the gap to 10–12 inches so people can sit comfortably without touching the frames.
What is the best spacing between frames?
The ideal spacing between frames on a gallery wall is 2–3 inches. This range helps the eye read the frames as one connected composition instead of separate pieces. A 2-inch gap feels tighter and more formal, while a 3-inch gap feels more relaxed and airy.
Consistency keeps the wall looking intentional. Spacing tighter or wider than the 2-to-3-inch range often makes the arrangement look cluttered or disconnected, and inconsistent spacing is the most common reason an arrangement looks unfinished. Pick one number, 2 inches or 3 inches, and use it for every gap in the layout.
Adjust slightly for frame size. For very small frames under 8×10 inches, tighten to 1.5–2 inches. For large frames 18×24 inches or bigger, you can push to 3–3.5 inches without losing the grouping effect.
6 proven living-room gallery wall layouts
These six layouts give you exact frame counts, approximate dimensions, and sofa-specific tips. Width targets assume a standard 78-inch sofa, so adjust proportionally for your own.
1. Symmetrical grid
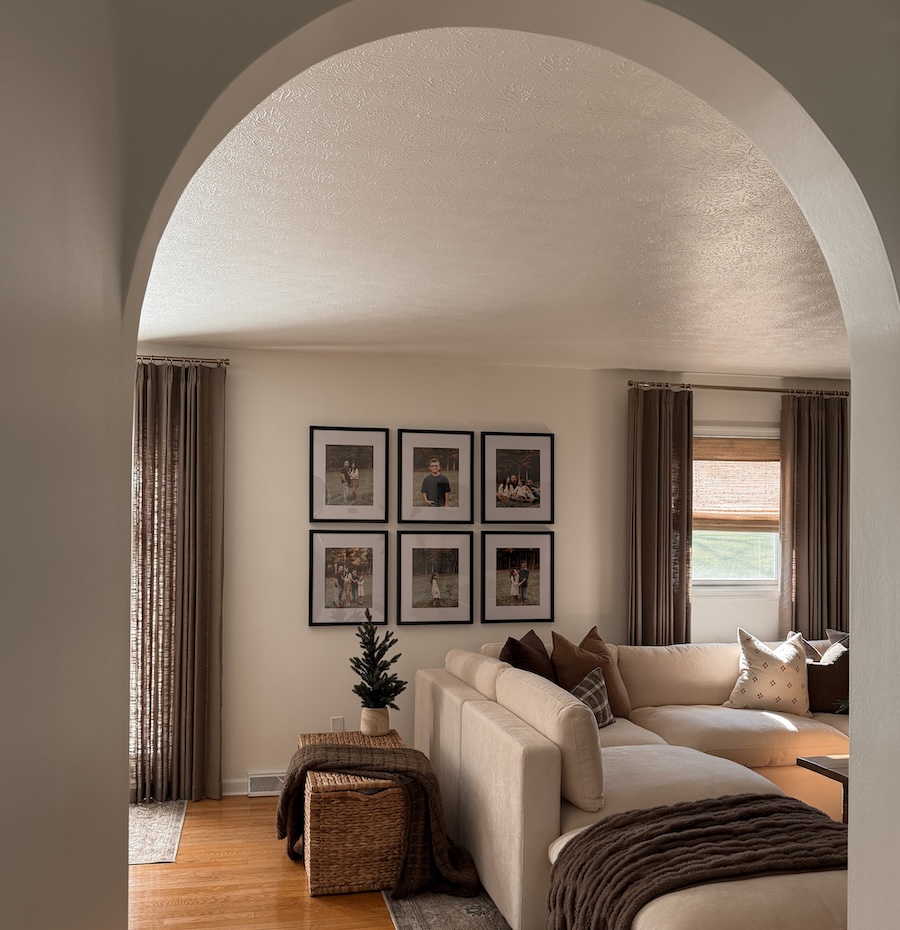
The Classic Grid layout uses equal-sized frames in a mathematically perfect grid and stays popular for living rooms. A 2×3 arrangement of six identical frames with 2–3 inches of spacing between them creates a clean, modern anchor above a sofa. Keep the bottom row 6–8 inches above the sofa back and the center of the arrangement at 57–60 inches from the floor. Frameology’s Classic Grid, priced at $594, is a ready-to-hang version of this layout.
2. Asymmetric anchor
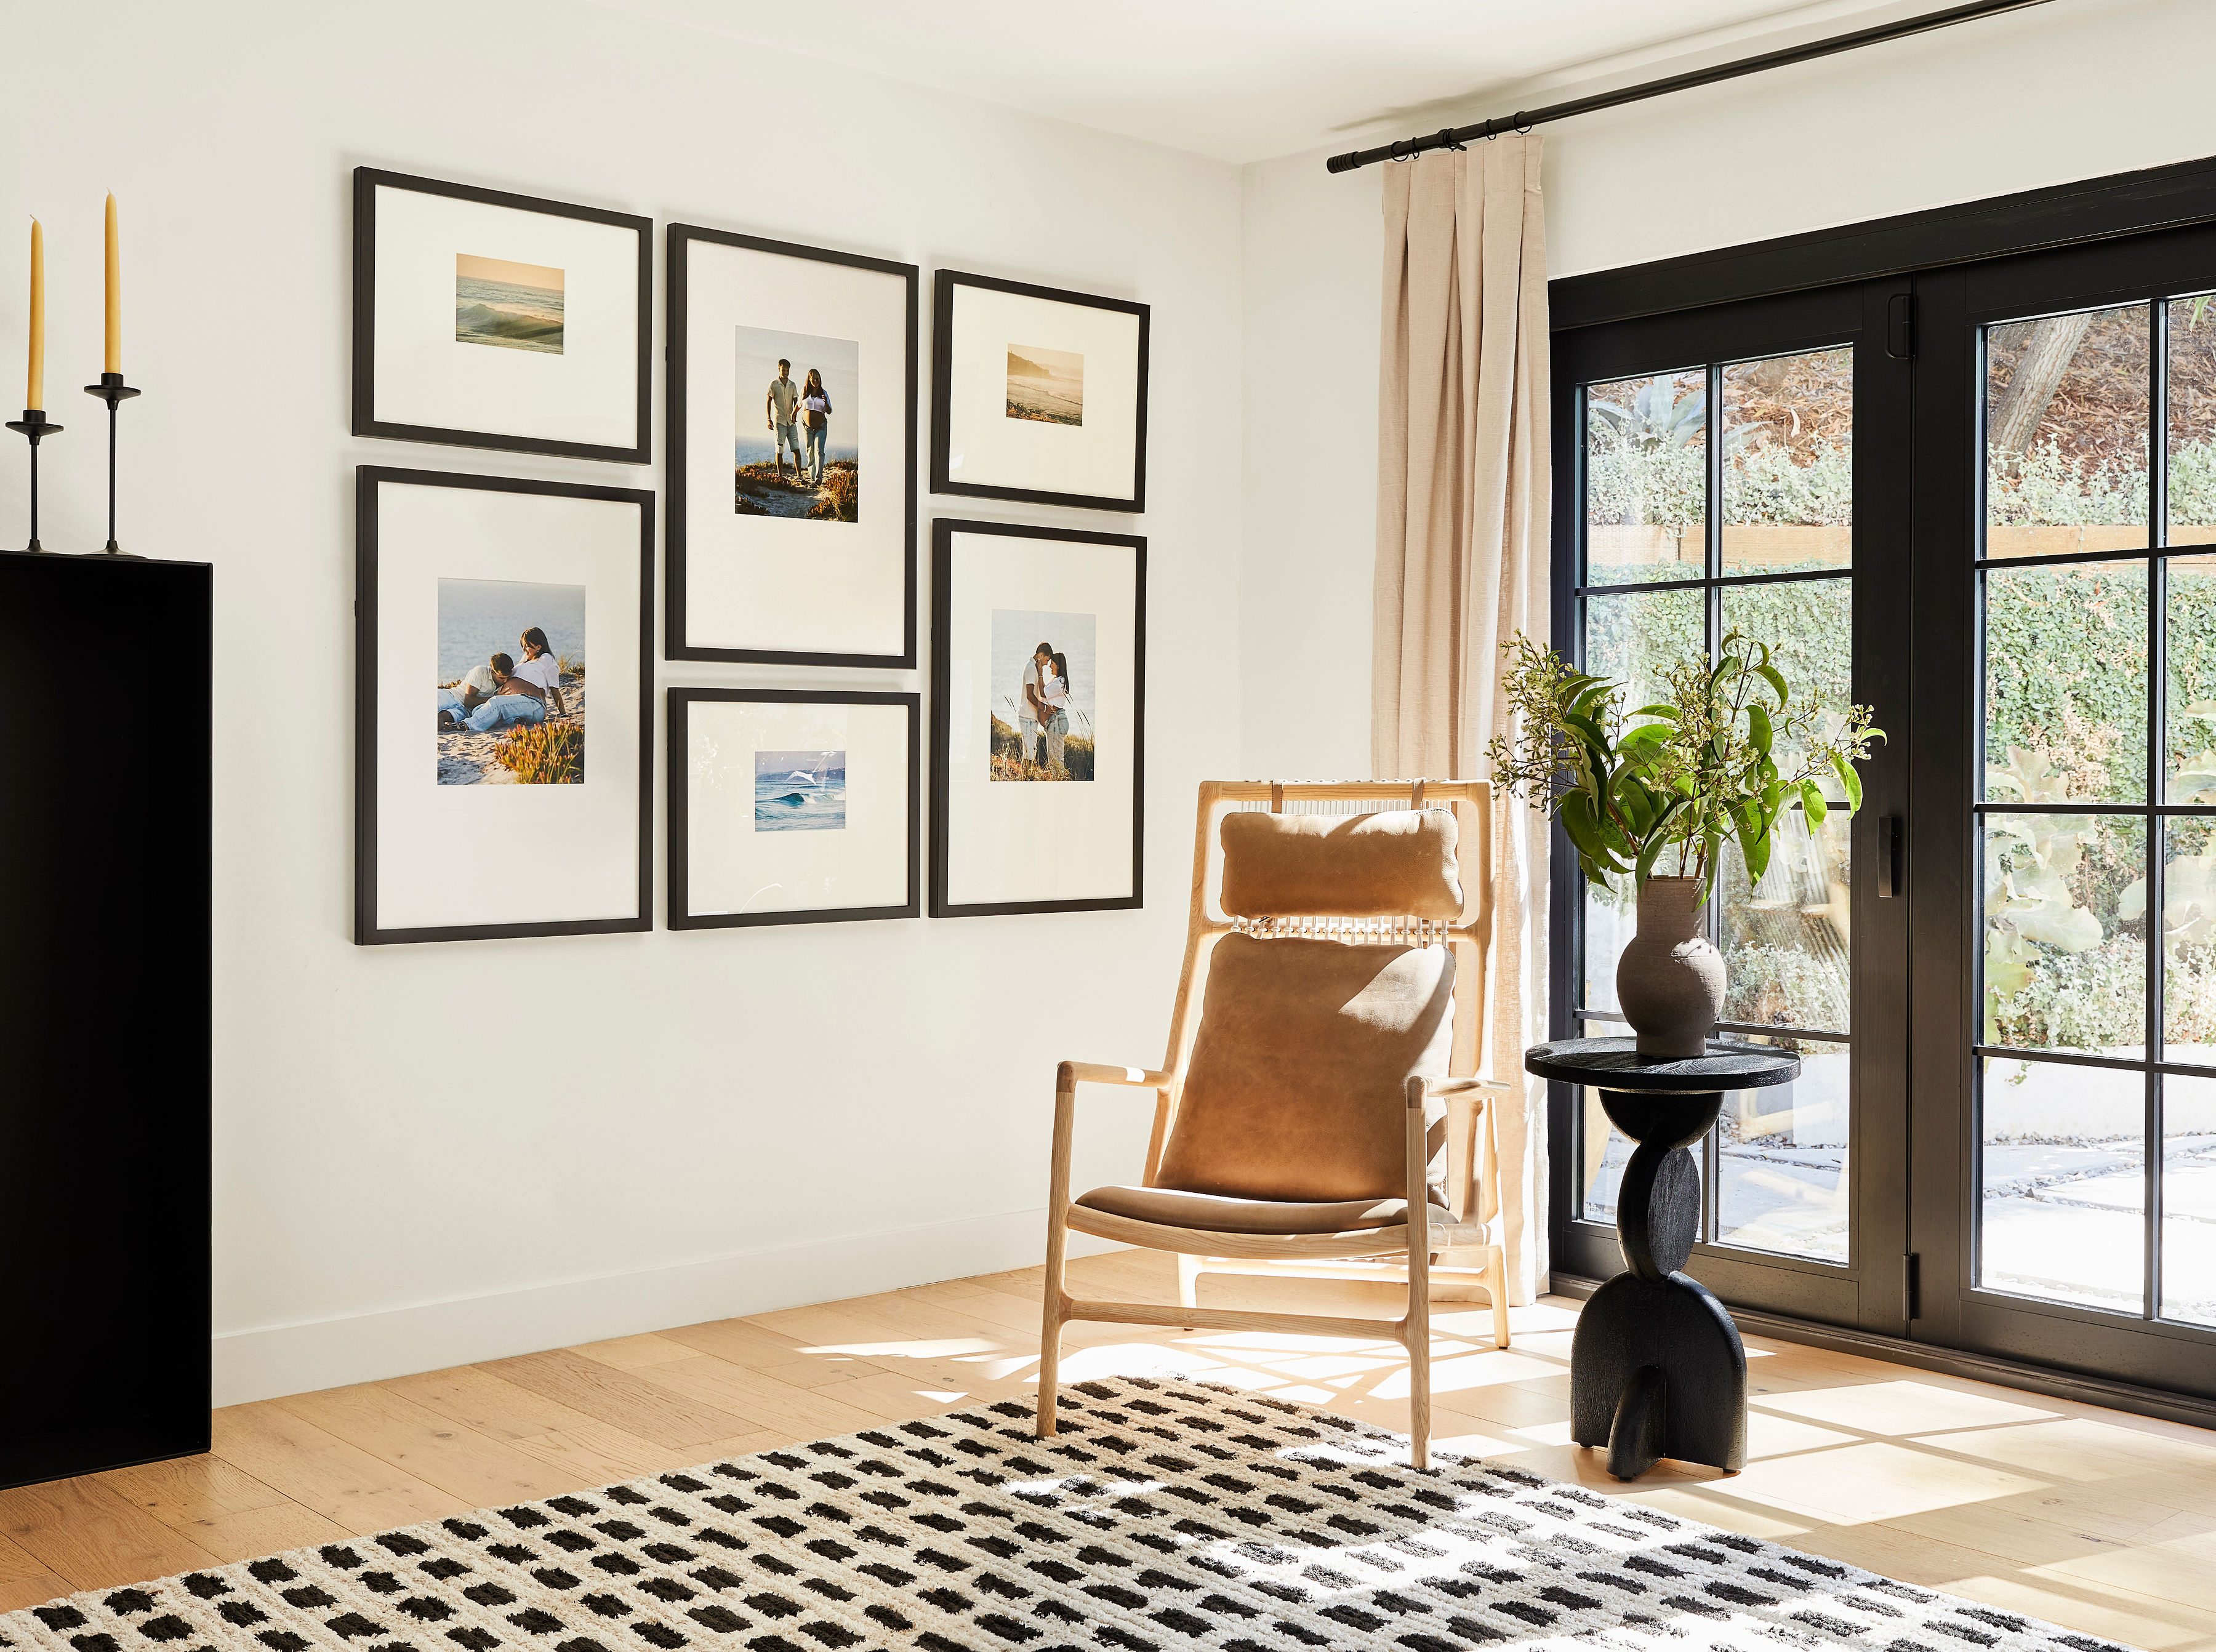
The Asymmetric Cluster layout uses five to seven different-sized frames arranged around an invisible center point, with one large anchor piece comprising about 40% of the total display width. Place the anchor piece slightly off-center, then build outward with two to four smaller frames on the opposite side, keeping 2–3 inches of spacing throughout. The salon hang is the most popular gallery wall format overall and works especially well above a sofa because the off-center anchor adds energy without feeling chaotic. Keep the total width at 60–75% of the sofa’s width.
3. Horizontal row
The Horizontal Row layout places three to five frames in a straight horizontal line with centers aligned at the same height, which naturally suits the long line of a sofa. Space frames 3–4 inches apart for a relaxed look or 1.5 inches for a cohesive band, with centers aligned at 57 inches from the floor. Keep the bottom edge of every frame 6–10 inches above the sofa back. Three landscape-oriented frames in a single row spanning about 50–55 inches work well for a standard sofa.
4. Triptych
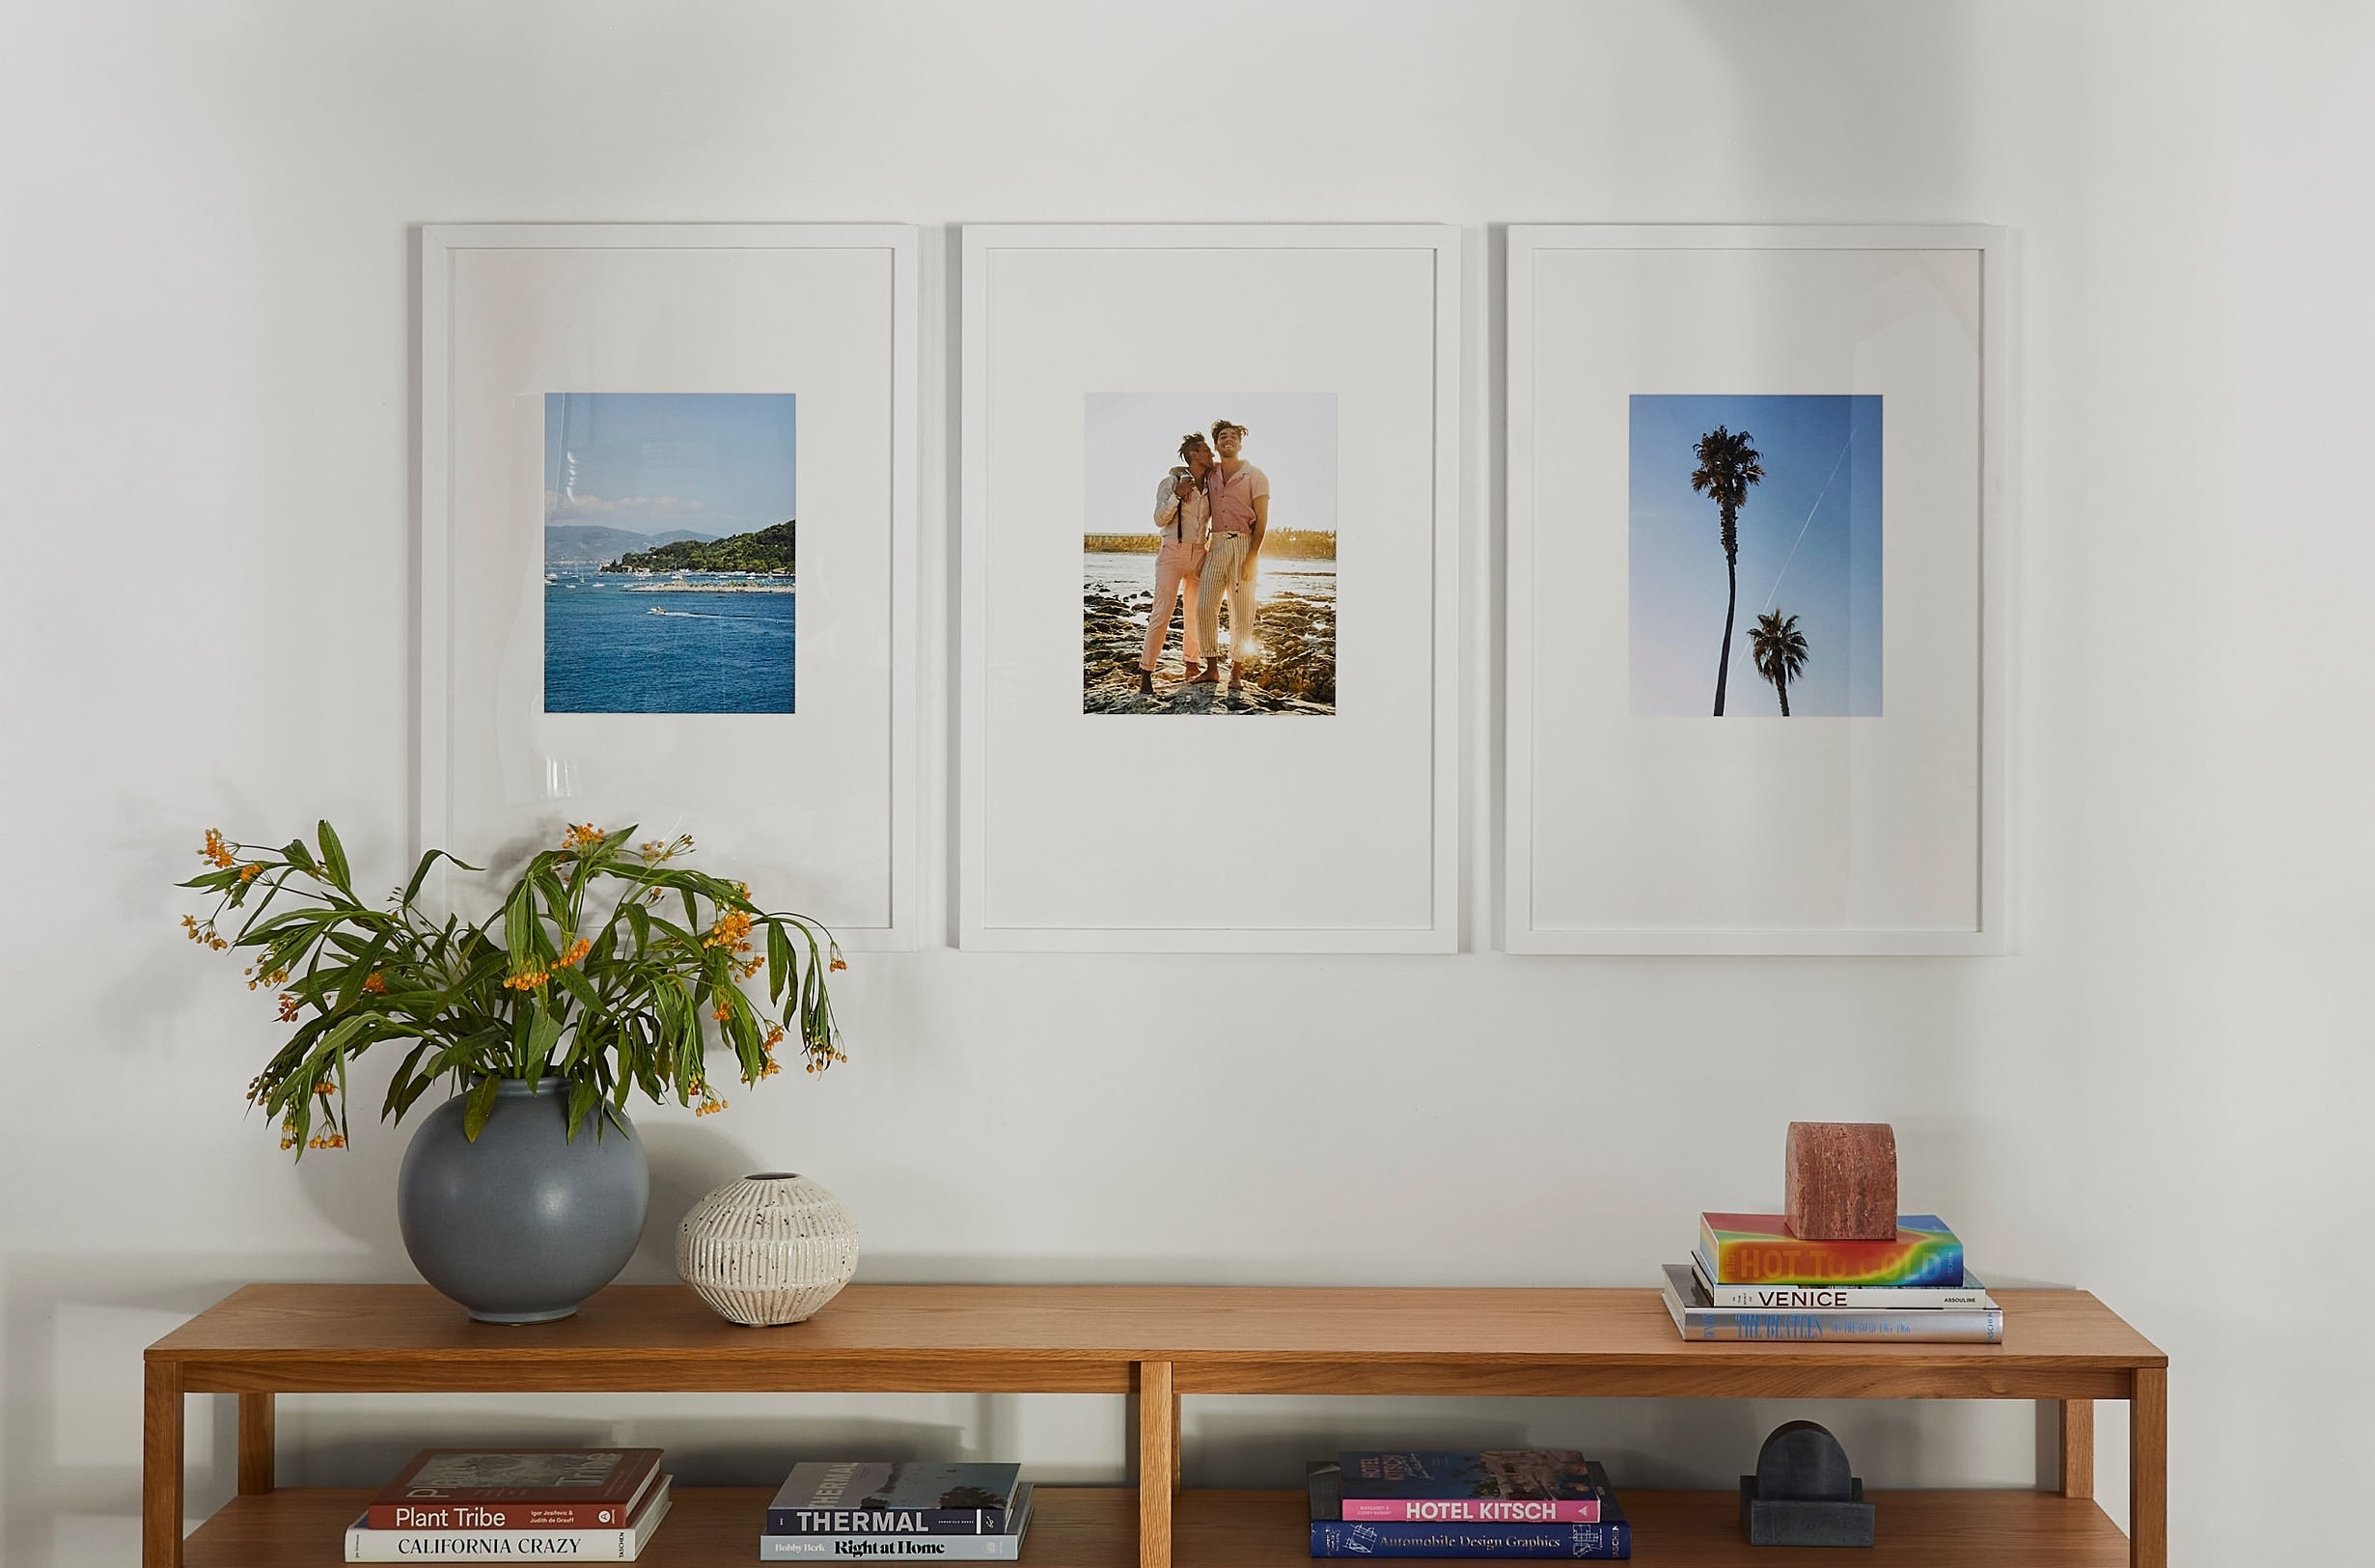
The Triptych layout splits one continuous image across three panels with 1–2 inch gaps so the panels read as a single composition. The combined width should equal 60–75% of the sofa width. This layout works especially well with travel or landscape photography. Frameology’s Classic Triptych, priced at $297, and Luxe Triptych, priced at $657, are ready-to-hang versions of this concept. As Apartment Therapy noted in their review, the frames felt sturdy rather than mass-produced and included an easy-to-use gallery wall template for suggested spacing.
5. Salon cluster
A salon-style asymmetrical cluster of 8–15 mixed-size frames packed tightly and anchored by one large piece placed off-center is the most requested gallery wall format. Use 2–3 inches of consistent spacing between all frames. The salon hang is described as controlled eclecticism, which looks effortless but benefits most from a life-size gallery wall template laid out on the floor before anything goes on the wall. Bobby Berk described his inspiration for the Luxe Bricklay, priced at $1,074: "I wanted to create a gallery wall layout that was versatile, simple, and symmetrical. I was inspired by the way bricks are laid in a stairstep pattern, and used 2 different sized frames to recreate that." As CNN Underscored’s Stephanie Griffin wrote: "The Luxe Bricklay is called 'luxe' for a reason. Between the premium materials and foolproof hanging system that saved so much time and stress, it’s worth the hype."
6. Linear stack
A linear stack arranges three to five frames in a vertical column, centered above the sofa. This layout works well on narrower walls or when you’re flanking a larger piece. Keep 2–3 inches between each frame vertically, and position the center of the stack at 57–60 inches from the floor. The bottom frame should still clear the sofa back by 6–10 inches, so plan the stack’s overall height carefully and measure from the sofa top up before choosing frame sizes. Frameology’s Classic Stack, priced at $225, is a ready-to-hang version of this layout, complete with a gallery wall template.
Explore Frameology’s ready-to-hang gallery wall layouts.
How to use a gallery wall template in four simple steps
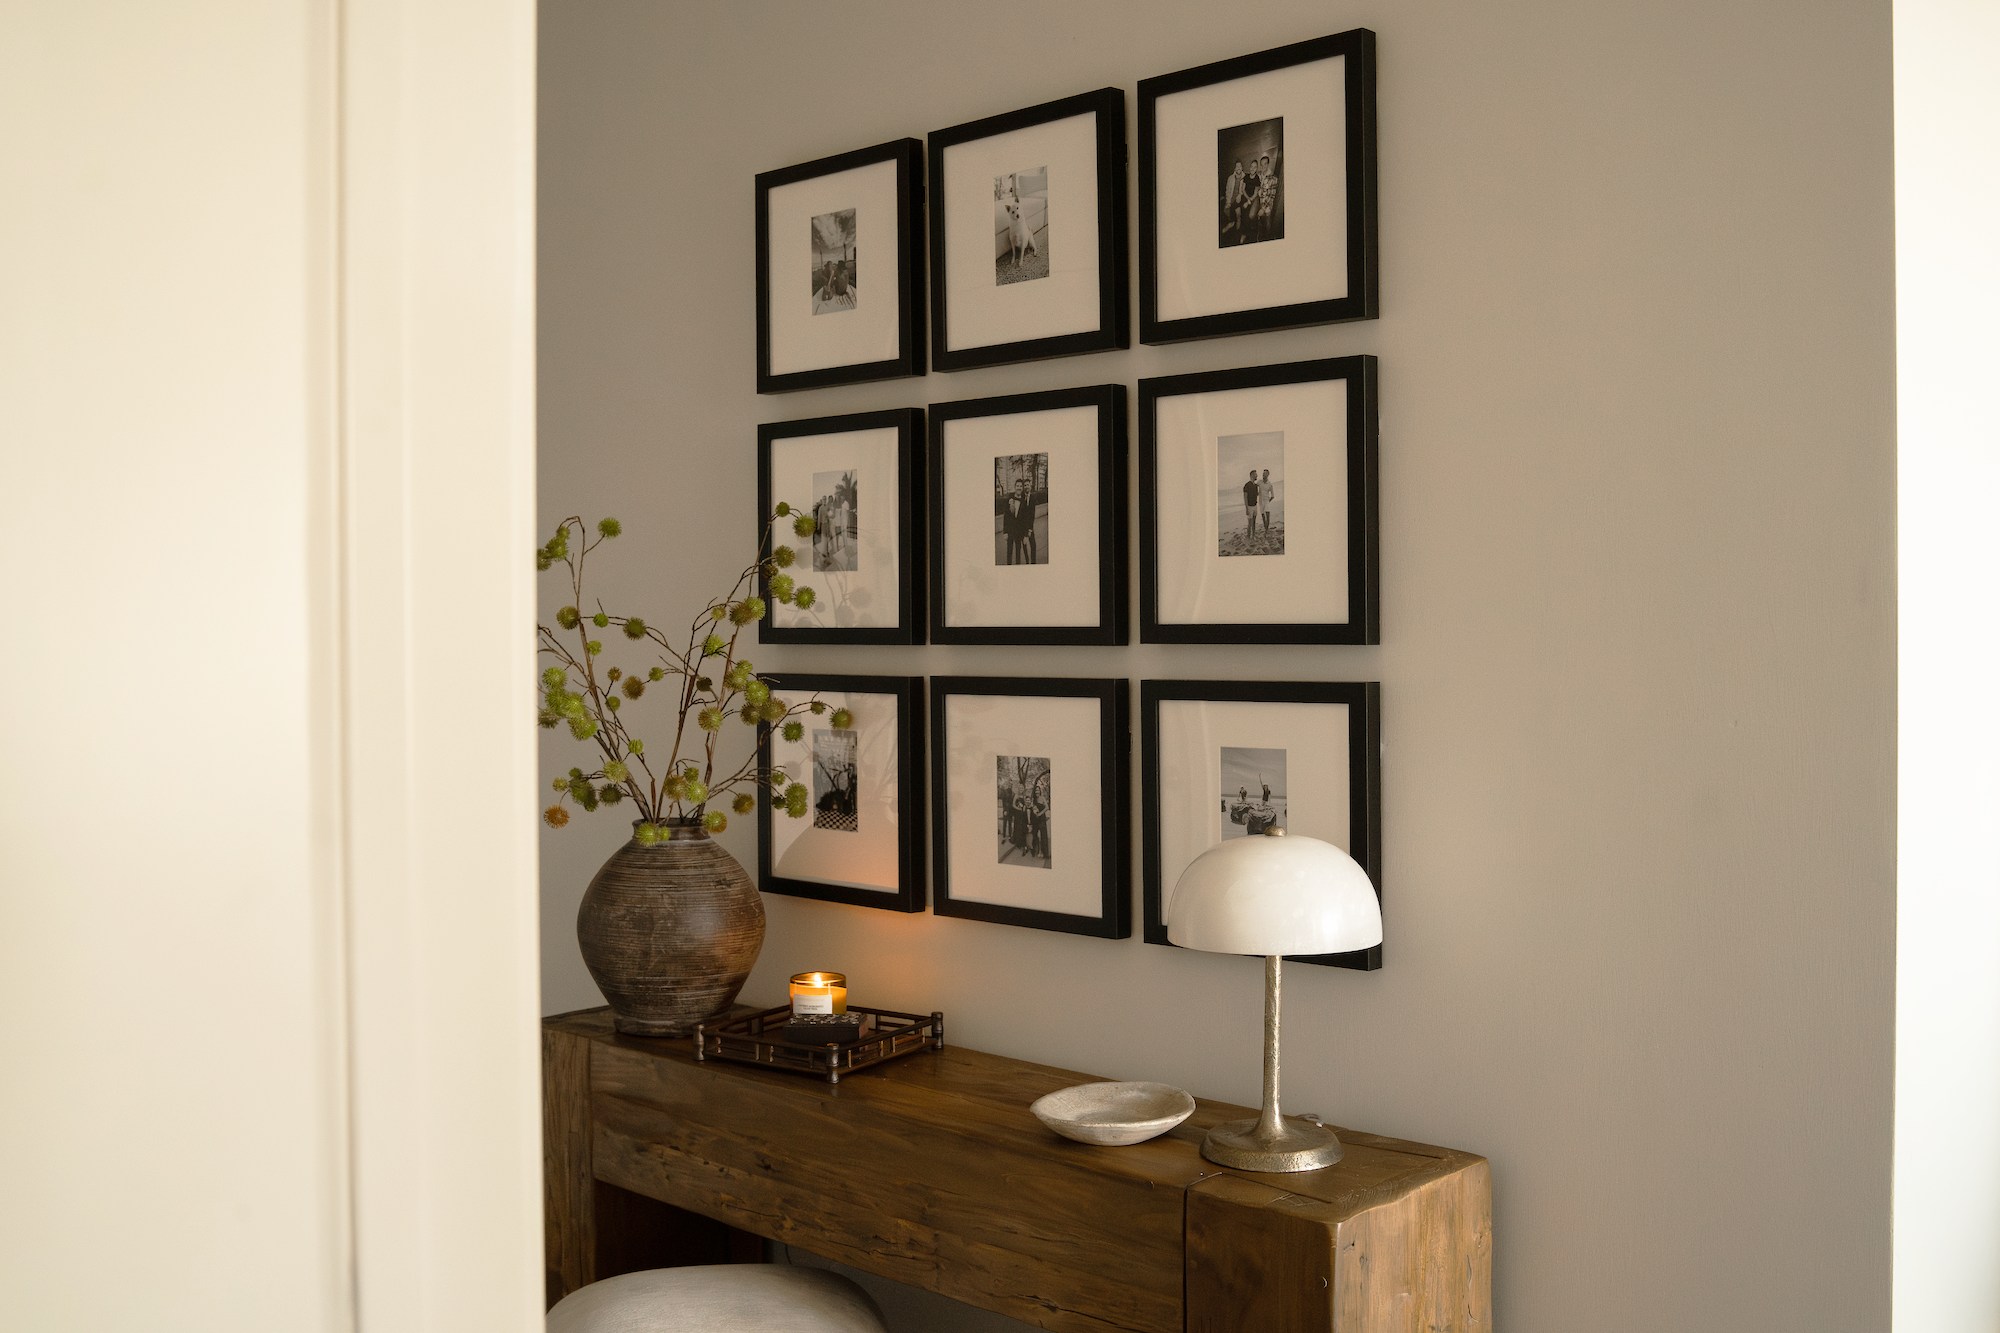
Frameology’s gallery wall templates remove the trial-and-error that usually causes extra holes and crooked frames. Both Classic and Luxe gallery walls include a custom, life-size gallery wall template, and the installation process shifts slightly between the two lines because each frame hangs differently.
Classic gallery walls (single center hanger)
Classic frames use a single metal center hanger per frame, so the process stays simple and quick.
Tape the life-size gallery wall template to the wall at the correct height, using the sofa-to-frame measurements above as your guide.
Mark the nail positions through the template at each center-hanger point.
Remove the template and hammer nails into the marked spots.
Hang your frames, which usually takes less than an hour from start to finish.
The Classic Stack, priced at $225, is a great starting point for this method. Classic frames also feature a removable backing, so you can swap photos whenever you want without taking the frame off the wall.
Luxe gallery walls (dual side hangers)
Luxe frames use a premium no-wire hanging system with two side hangers, one on the left and one on the right, which creates perfect leveling and extra stability.
Tape the life-size gallery wall template to the wall at the correct height.
Create dimple marks through the template at each left and right hanger point.
Remove the template, then hammer plastic markers and nails into the wall at each marked position.
Hang your frames, using the included nails and mini-level that come in the box.
The Luxe Diptych, priced at $638, is an excellent entry point for the Luxe system. Luxe frames feature a sealed, permanent kraft paper backing that protects your photos long term, so photos can’t be swapped, but the finished piece looks professionally installed.
On mobile, Frameology’s augmented reality (AR) tool, which stands for augmented reality, lets you preview your gallery wall or frame directly on your actual wall before you buy, with no app download required. It’s a helpful way to confirm sizing and placement before you commit. For a deeper look at how Classic and Luxe differ across materials, hardware, and shipping, read Frameology’s full Classic vs. Luxe comparison.
Frequently asked questions
How high should a gallery wall hang above a couch?
The bottom of the lowest frame should sit 6–10 inches above the top of the sofa back, which matches the sofa gap in the formula above. For high-cushion sofas, increase the gap to 10–12 inches so frames aren’t bumped when people lean back. Aim for the center of the entire gallery wall arrangement to land at 57–60 inches from the floor, and let the sofa gap rule take priority when the two guidelines conflict.
What is the best spacing between frames on a gallery wall?
Two to three inches between frames is the standard range that creates a cohesive look without feeling cluttered or disconnected, as explained above. The most important detail is consistency, so pick one measurement and apply it to every gap in the layout. For very small frames under 8×10 inches, you can tighten to 1.5–2 inches, and for large frames 18×24 inches or bigger, 3–3.5 inches still keeps the grouping effect.
How wide should a gallery wall be above a sofa?
The gallery wall should span roughly two-thirds of the sofa’s width, which is the same 52-inch target for a standard 78-inch sofa mentioned in the formula. Going narrower makes the arrangement look undersized relative to the furniture, and going wider than about 75% of the sofa width can feel overwhelming and unbalanced.
Do all gallery walls include hanging templates?
Classic and Luxe gallery walls include life-size gallery wall templates that make installation simple and straightforward. Canvas galleries, Metal galleries, and gallery walls created using Frameology’s Gallery Wall Design Service don’t include templates because their construction and customization work differently and often need more tailored installation approaches.
What’s the difference between Classic and Luxe gallery walls?
Classic gallery walls, starting at $198, use Classic frames with a single center hanger per frame and a removable backing so you can swap photos whenever you like. They ship quickly and typically arrive within a week. Luxe gallery walls, starting at $638, use museum-quality frames with a sealed permanent backing and a dual side-hanger system for precise leveling. All necessary hanging hardware, including nails and a mini-level, comes in the box. Luxe products take 7–10 business days because of their artisan craftsmanship. Both Classic and Luxe gallery walls include a life-size gallery wall template.
Can I preview a gallery wall before buying?
Frameology’s AR tool, which stands for augmented reality, is available on mobile and lets you project a true-to-scale preview of your gallery wall or frame directly onto your actual wall using your phone’s camera before you buy. No app download or log-in is required. It’s a helpful way to confirm sizing and placement, especially when you’re deciding between layouts or frame sizes for a specific sofa width.
The right layout is the one you’ll actually hang
A gallery wall above the sofa doesn’t have to turn into a measuring headache. Use the living room formula, with a 6–10 inch sofa gap, 2–3 inch frame spacing, an anchor piece placed first, and a gallery width around two-thirds of the sofa, and you’ll get a professional result before a single nail goes in. Frameology’s ready-to-hang Classic Stack, priced at $225, and Luxe Diptych, priced at $638, take it further with life-size gallery wall templates that mark every nail position before you commit. No guesswork, no extra holes, and no need to hire help. For more on why Frameology is a go-to choice for online framing, read why Frameology is the best online framing service.
Get your gallery wall with template included at Frameology.
